Connect your Shopify store to Sabi
Posted by
Latest Posts

Sabi is your always-on AI teammate. You text it like a person, and it gets things done in the apps you already use. Connect your Shopify store and Sabi can:
- Answer questions about your store in plain words. "How many orders came in this week?" "Which products are low on stock?"
- Update products without opening Shopify. New listings, prices, descriptions, and inventory counts.
- Look after customers and orders. Draft orders, discount codes, fulfillment updates, and customer lookups.
- Keep an eye on things for you. Ask Sabi to check orders or stock on a schedule and text you what changed.
Don't have a Sabi account yet? Set up your free account first. It takes a minute.
Connecting takes about five minutes
Shopify changed how stores connect in 2026. You'll make a small private app in Shopify and give Sabi its two keys. You only do it once.
Keep Sabi's connect window open in another tab. You'll copy one list out of it and paste two keys into it.
Before you start
You need to be the store owner, or have app development access from them. If Shopify says you don't have developer access yet, ask the owner to grant it, or ask them to do these steps for you.
1. Find your Dev Dashboard
Every Shopify store comes with a Dev Dashboard. Most people have never opened it, and that's fine.
Click dev.shopify.com/dashboard and sign in with the same email and password you use for your store.
Another way in: from your store, open Settings, then Apps, then click Build apps in Dev Dashboard.
If Shopify asks you to set up a developer account first, follow its prompts. It's free and takes a minute. When you land on the dashboard, click Apps in the left menu.
2. Create the app
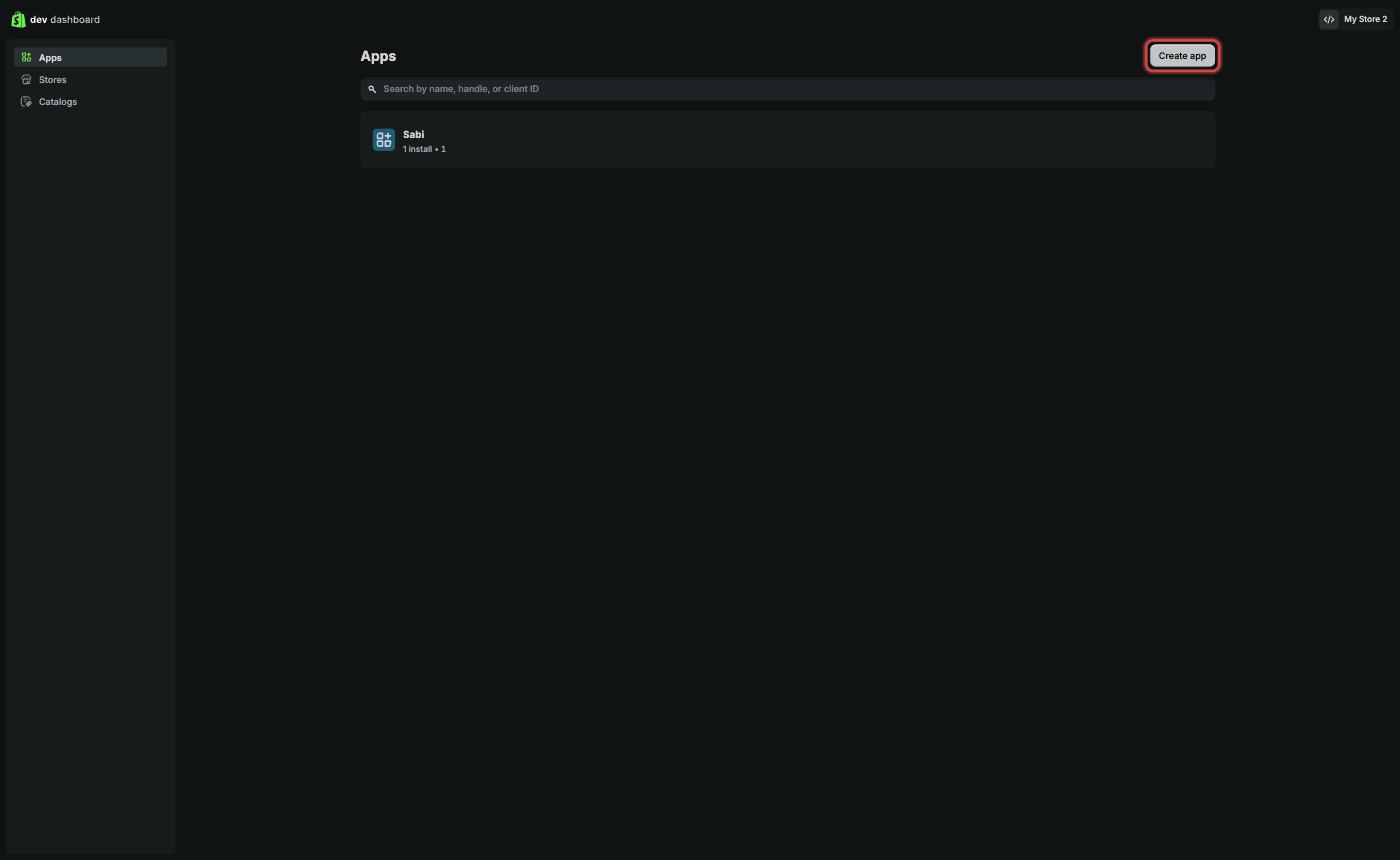
Click Create app at the top right.
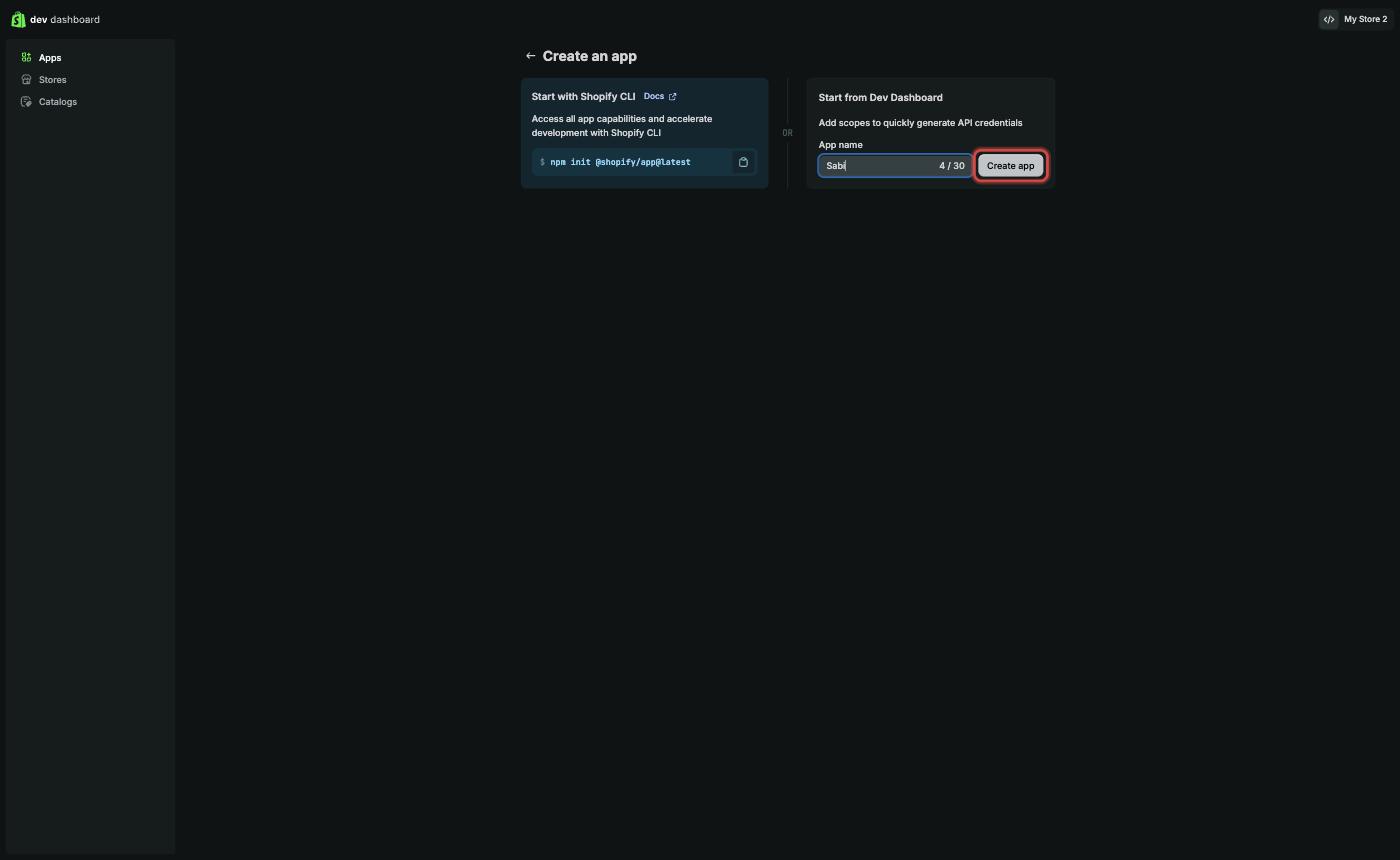
On the next page, under Start from Dev Dashboard, type Sabi as the app name and click Create app.
3. Choose what Sabi can see
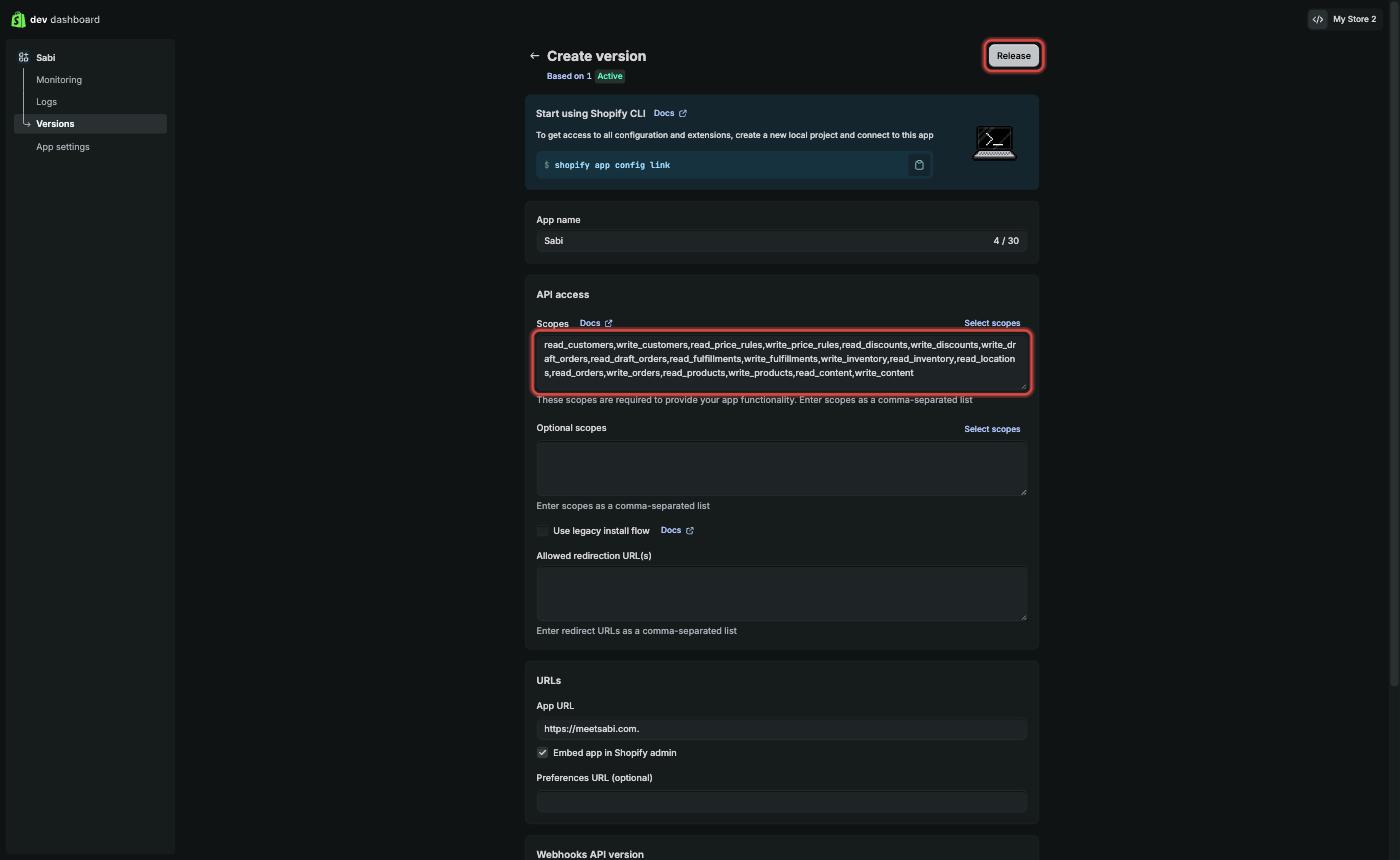
Shopify now shows a page called Create version. Find the section called API access.
Copy the permission list from Sabi's connect window (it has a Copy button) and paste it into the Scopes box. Then click Release at the top right.
4. Install it on your store
Click Sabi in the left menu to open the app's Overview. Click Install app.
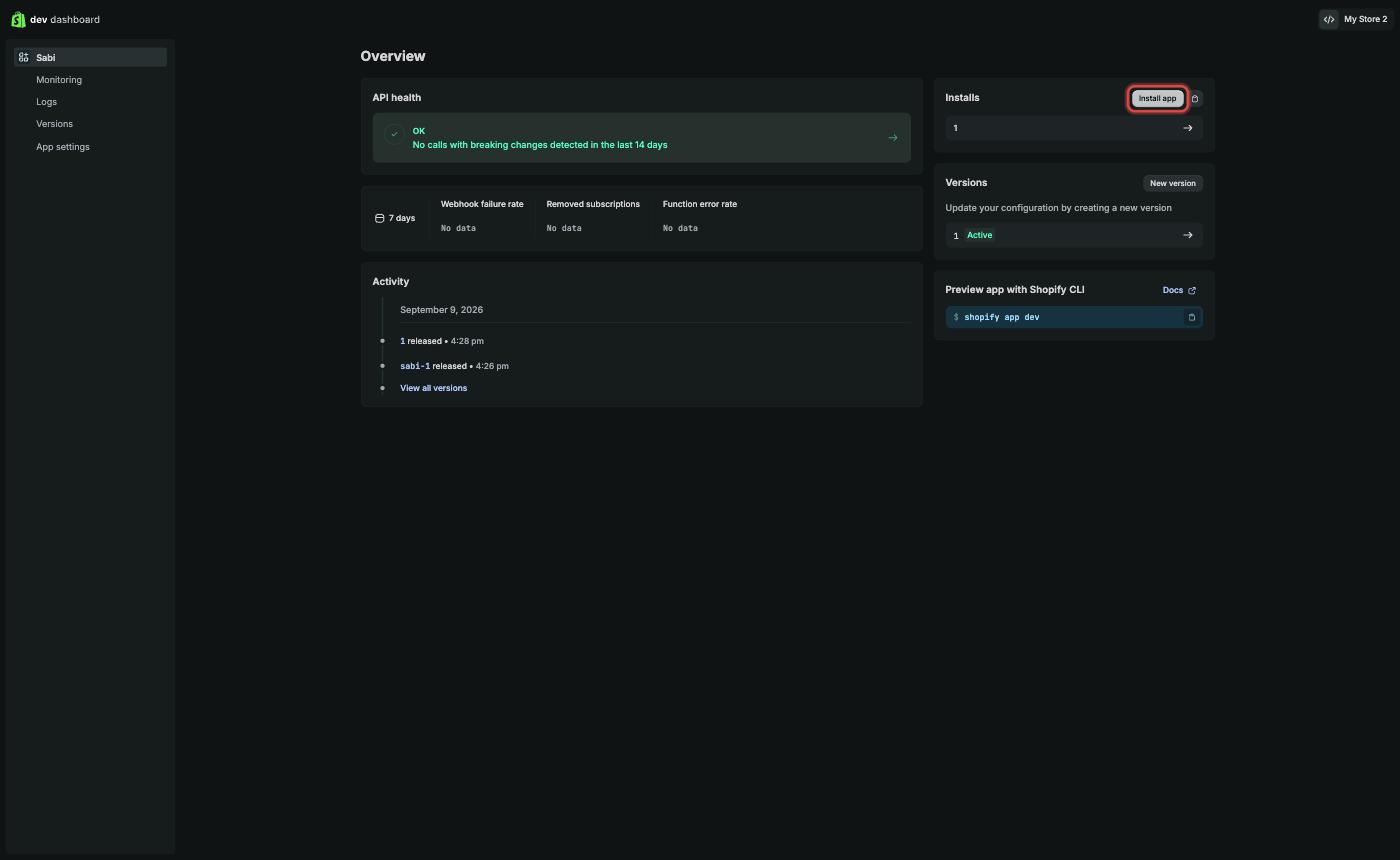
A Shopify page opens and asks which store to install on. Pick your store and confirm.
5. Copy your two keys
Click App settings in the left menu. Under Credentials you'll see a Client ID and a Secret. Use the copy button next to each one.
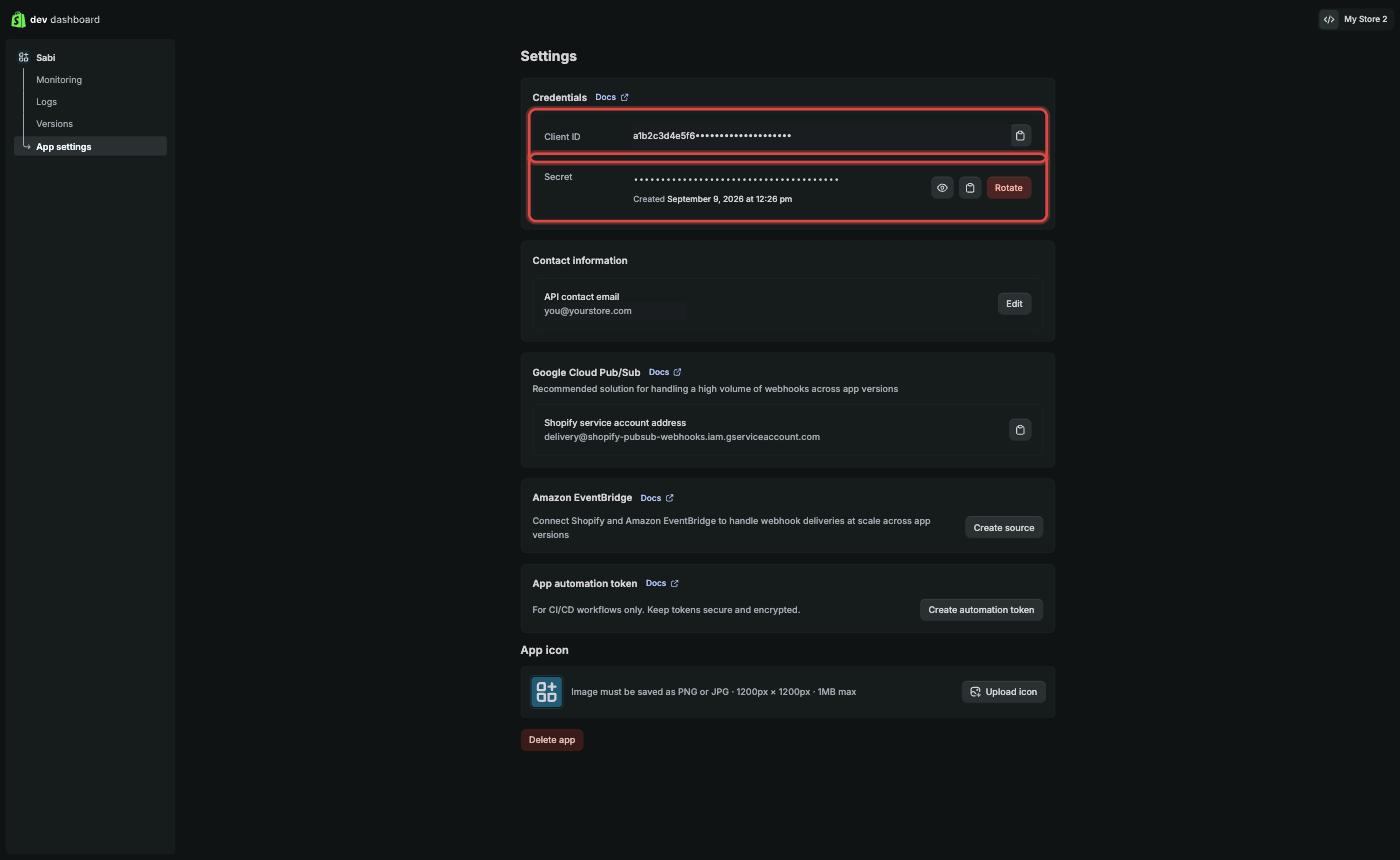
Paste them into Sabi's connect window, along with your store handle. The handle is the part before .myshopify.com in your store's address.
Press Test and connect. Sabi shows your store's name when it works.
If it doesn't connect
- "We couldn't reach that store." Check the handle. Type just the part before .myshopify.com, like acme-store.
- "Your keys are right, but the app isn't installed on this store yet." Go back to step 4 and click Install app.
- "Your app is missing … permissions." Part of the list didn't make it in. In the Dev Dashboard open Versions, add the missing ones under API access, click Release, then try again.
- "Shopify rejected those keys." Copy the Client ID and Secret again with the copy buttons, so nothing is missed.
- Nothing happens after Test and connect. Refresh the page and try again. If it still fails, text Sabi and we'll take a look.